[Day 11] 제네릭 인터페이스, 타입 별칭, 클래스, 프로미스
1. 제네릭 인터페이스, 제네릭 타입 별칭
interface KeyPair<K, V> {
  key: K;
  value: V;
}
- 객체의 타입을 제네릭 인터페이스로 정의하고 변수의 타입으로 정의해 사용한다.
interface Student {
    type: "student";
    school: string;
}

interface Developer {
    type: "developer";
    skill: string;
}

interface User<T> {
    name: string;
    profile: T;
}

function goToSchool(user: User<Student>) {
    const school = user.profile.school;
    console.log(`${school}로 등교 완료`);
}

const developerUser: User<Developer> = {
    name: "이정환",
    profile: {
        type: "developer",
        skill: "TypeScript",
    },
};

const studentUser: User<Student> = {
    name: "홍길동",
    profile: {
        type: "student",
        school: "가톨릭대학교",
    },
};
-
Student와 Developer는 서로소 유니온타입이고, 두 타입을 구분하는 User를 생성한다.
-
user에 제네릭을 적용해 특정 타입만 함수를 적용하게 만들어 타입 좁히기 코드 중복을 방지한다.
2. 제네릭 클래스
클래스의 이름 뒤에 타입 변수를 선언하면 제네릭 클래스가 된다.
class List<T> {
    constructor(private list: T[]) {}
    push(data: T) {
        this.list.push(data);
    }
    pop() {
        return this.list.pop();
    }
    print() {
        console.log(this.list);
    }
}

const numberList = new List<number>([1, 2, 3]); // 타입 변수의 타입을 직접 지정하는 방법
const stringList = new List<string>(["1", "2"]);
- 클래스 문법은 생성자를 통해 타입 추론이 가능해서 변수에 할당할 타입을 생략할 수 있다.
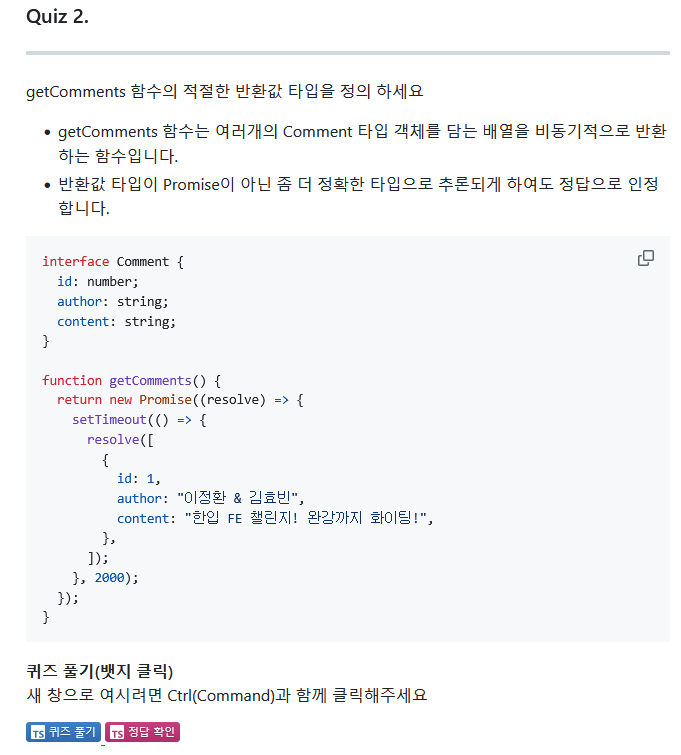
3. 프로미스와 제네릭
프로미스는 제네릭 클래스로 구현되어 있다. 변수에 할당할 타입을 직접 지정하면 해당 타입이 결과값의 타입이 된다.
const promise = new Promise<number>((resolve, reject) => {
  setTimeout(() => {
    // 결과값 : 20
    resolve(20);
  }, 3000);
});

promise.then((response) => {
  // response는 number 타입
  console.log(response);
});

promise.catch((error) => {
  if (typeof error === "string") {
    console.log(error);
  }
});
- reject (실패의 결과값) 타입은 unknown으로 고정되어있다. 좁히기를 통해 안전하게 사용한다.
function fetchPost(): Promise<Post> {
  return new Promise((resolve, reject) => {
    setTimeout(() => {
      resolve({
        id: 1,
        title: "게시글 제목",
        content: "게시글 본문",
      });
    }, 3000);
  });
}
- 반환값의 타입을 직접 명시해 직관적인 코드를 생성해 협업에 이롭게 만든다.
4. 과제